

Trajectory 1-2-3
Let’s add some tools to your toolbox!
A master around the green can control trajectory, distance the ball lands, and spin.
As you develop your comfort with the standard chip-and-run, which I call "Trajectory 1", start to challenge yourself by altering the trajectory.
Increasing the launch angle will result in both a higher trajectory and reduced roll.
As you move from trajectory 1 to 2 and 3, the carry percentage will increase as the roll percentage decreases. Develop trajectories 1, 2, and 3 for 54-60 degree wedges (not including a lob/flop).

If you can hit all three of these trajectories, you can navigate almost any shot from grass around the green. Start by mastering the set-up variations.
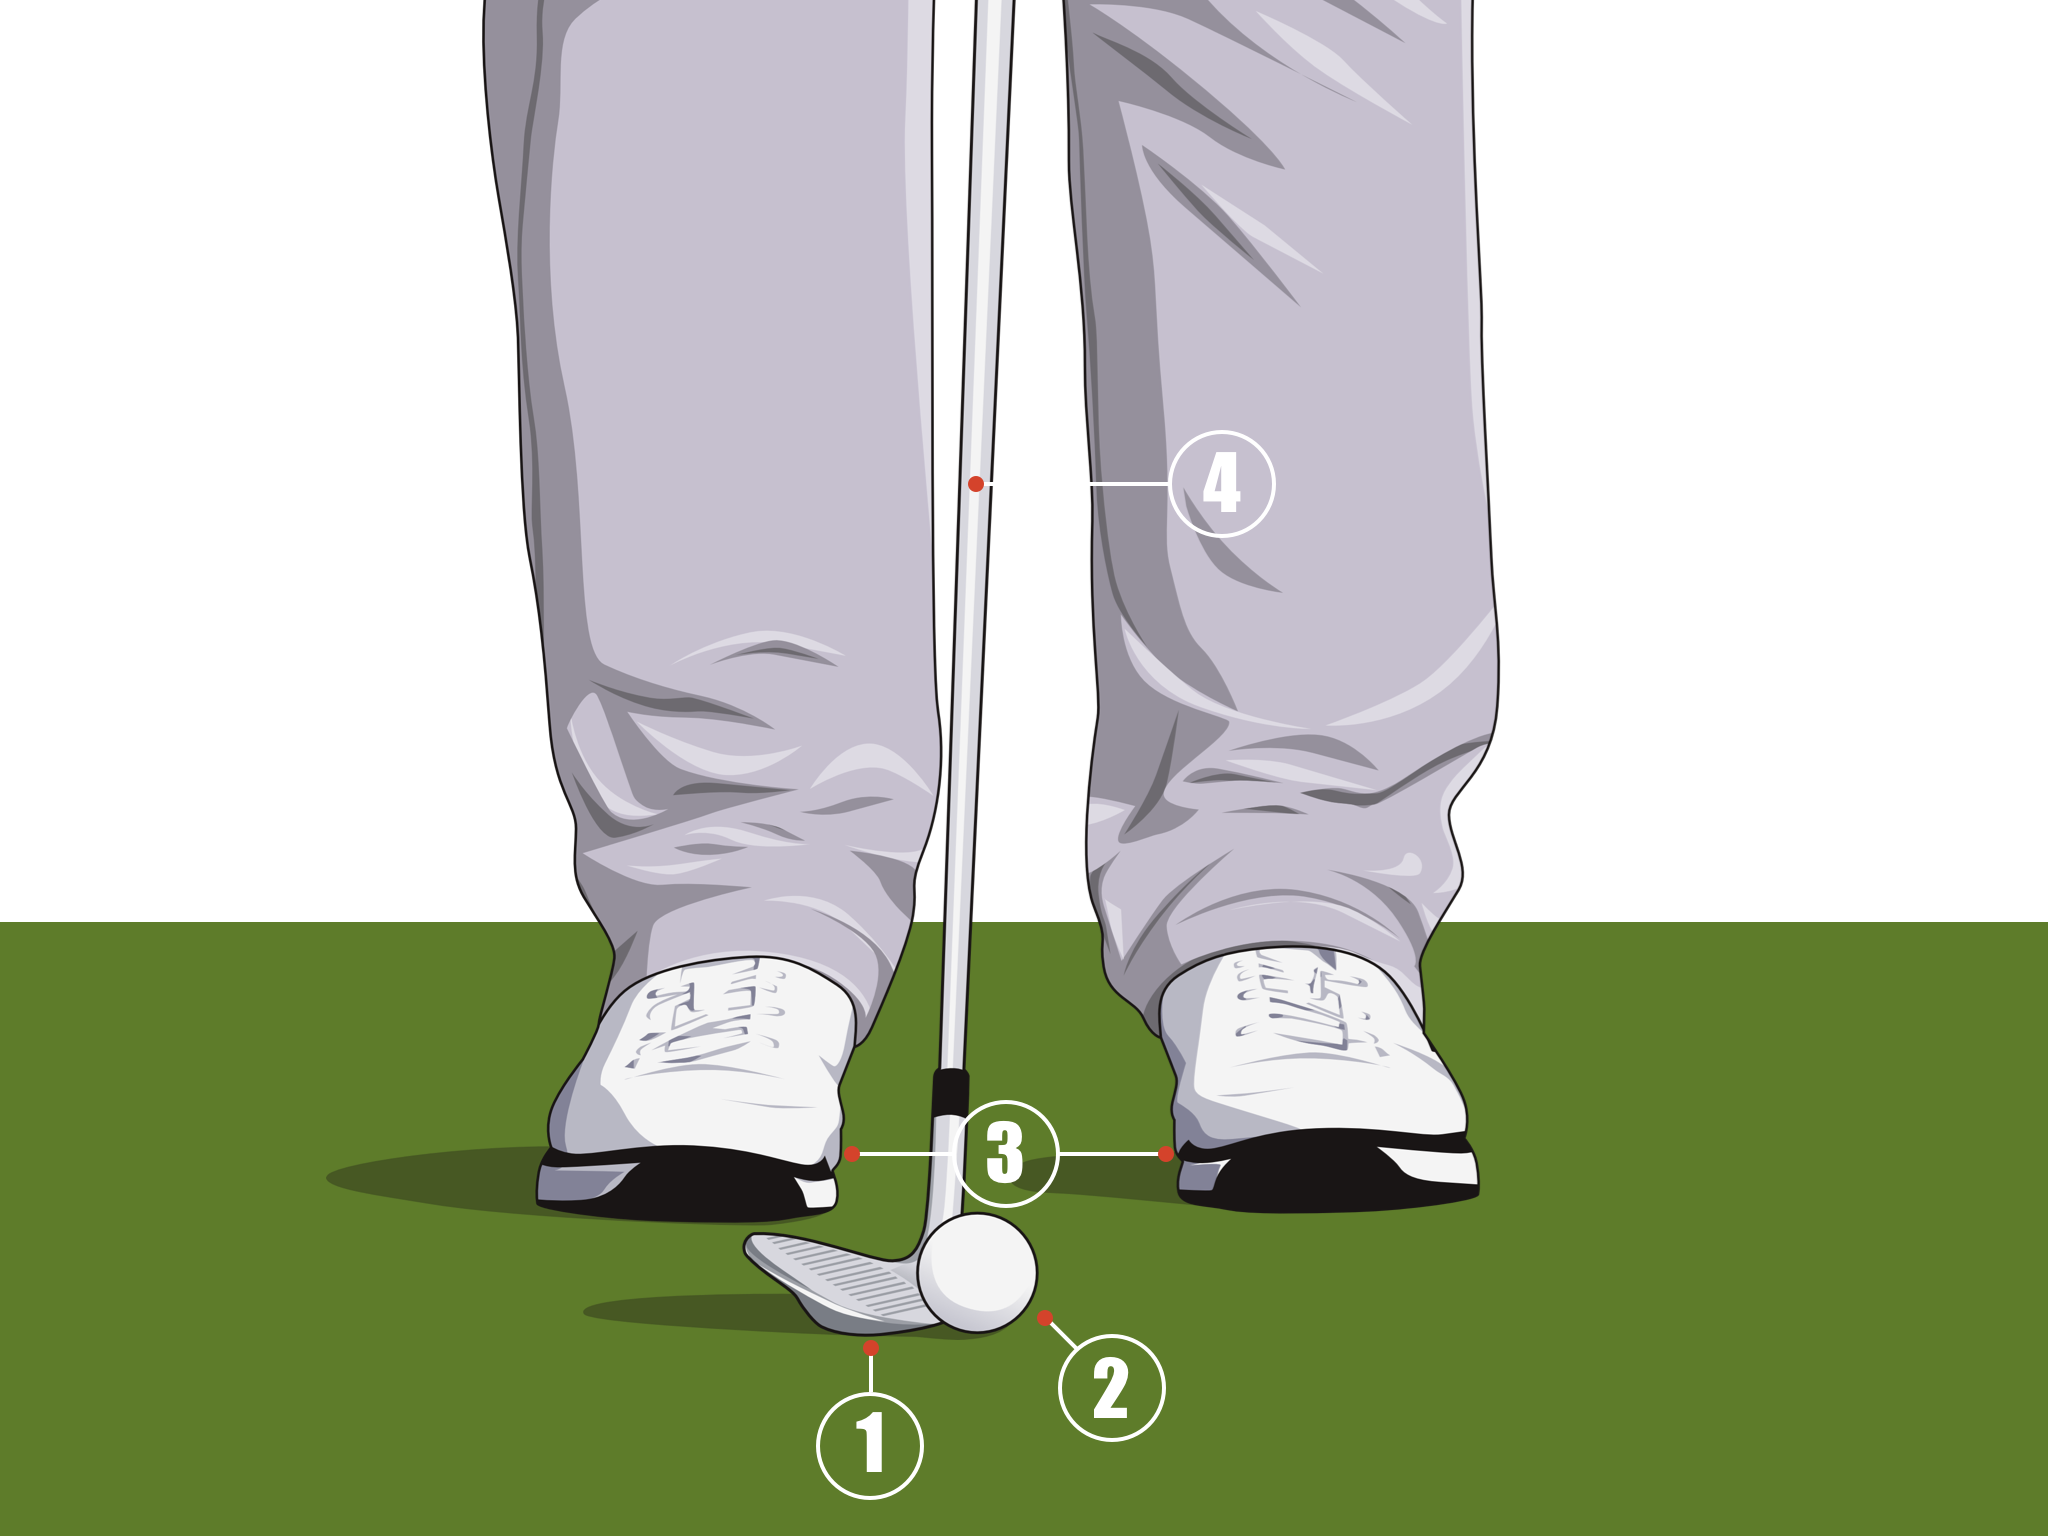
Trajectory 1: Lower-flighted with more roll relative to the club being used.
Set up for all Trajectories:
55-60% of weight on lead foot
Distance from ball: One shoe length
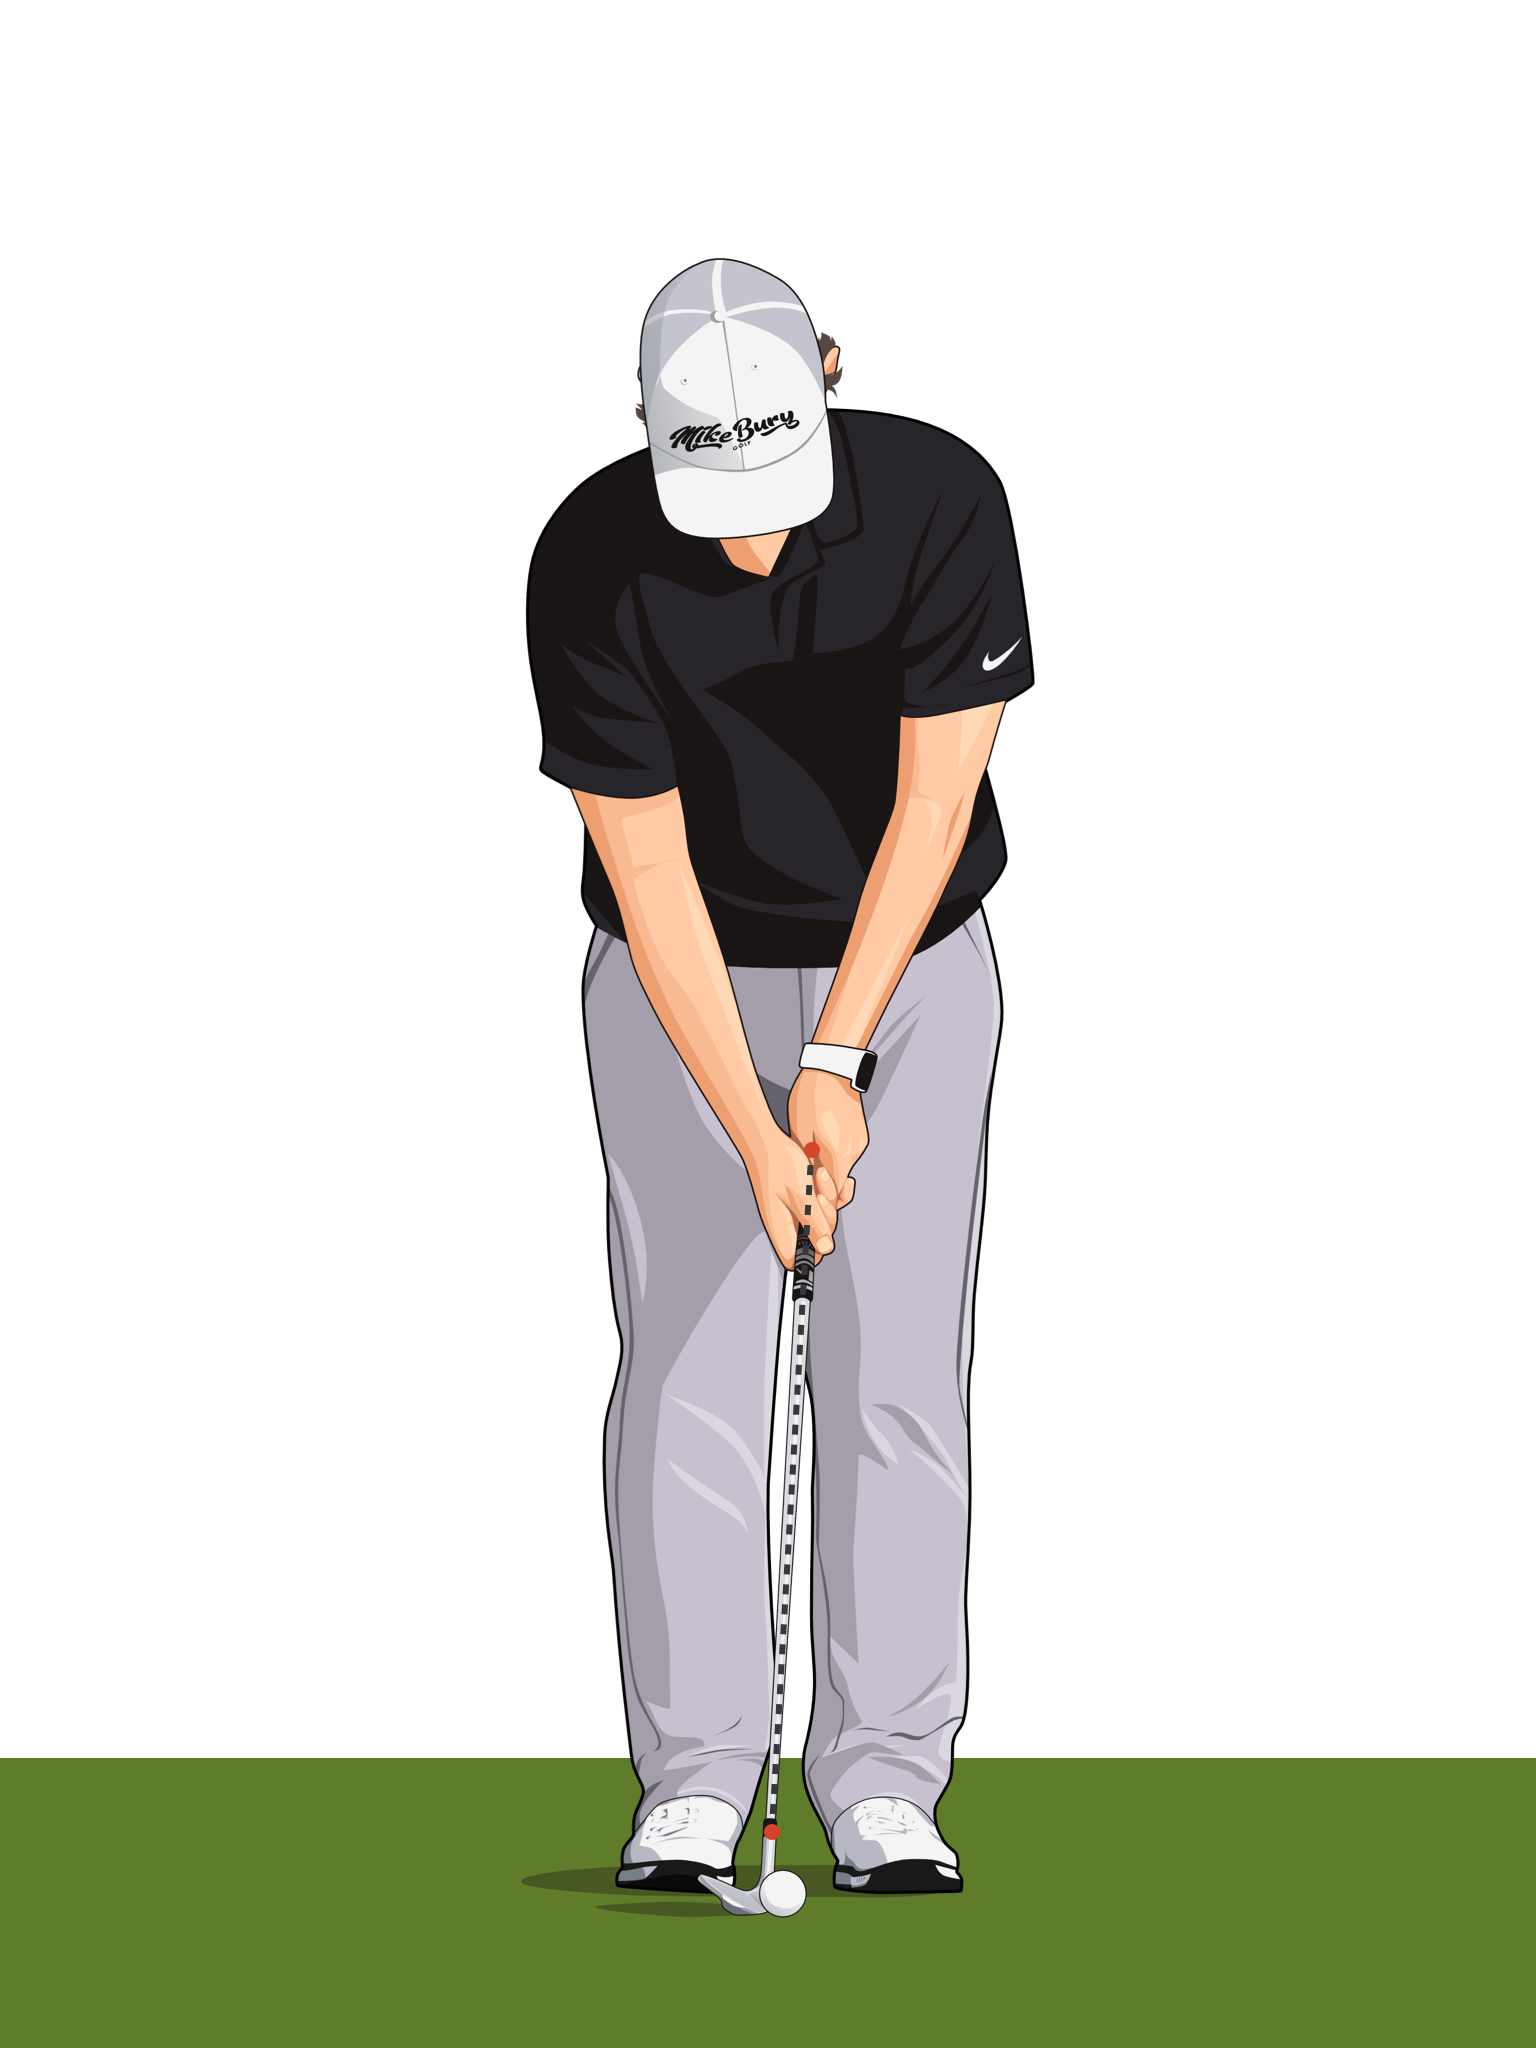
Grip down club
Shaft more upright


Trajectory 1: Additional Set Up Checkpoints.
1. Club face square
2. Ball in line with the back big toe
3. One club head in between toes
4. Forward shaft lean

The better you become at Trajectory 1, the better you'll be at Trajectories 2 and 3. Practice Trajectory 1-2-3 like piano scales, up and down with your ball flight.
Trajectory 2: Mid-flighted with less roll than trajectory 1 when the same club is used.
Set up for all Trajectories:
55-60% of weight on lead foot
Distance from ball: One shoe length
Grip down club
Shaft more upright


Trajectory 2: Additional Set Up Checkpoints.
1. Club face slightly open
2. Ball in center or stance
3. Slightly more than one club head in between toes
4. Slight forward shaft lean
Opening the club face increases the amount of bounce the club has. This increases the club's ability to skim as opposed to digging into the ground.
Trajectory 3: High-flighted with more less than trajectory 2 when the same club is used.
Set up for all Trajectories:
55-60% of weight on lead foot
Distance from ball: One shoe length
Grip down club
Shaft more upright


Trajectory 3: Additional Set Up Checkpoints.
1. Club face open
2. Ball in line with lead big toe
3. 1.5 to 2 clubs in between toes
4. Neutral shaft orientation

Be sure to practice opening the club face enough. Two common errors made with Trajectory 3 are not opening the face enough and having forward shaft lean!
Set Up Checkpoints
-

Trajectory 1
1. Club face square
2. Ball in line with the back big toe
3. One club head in between toes
4. Forward shaft lean -
Trajectory 2
1. Club face slightly open
2. Ball in center or stance
3. Slightly more than one club head in between toes
4. Slight forward shaft lean -

Trajectory 3
1. Club face open
2. Ball in line with lead big toe
3. 1.5 to 2 clubs in between toes
4. Neutral shaft orientation
As the club face changes from square to slightly open to more open, the alignment of the body must change as well for the ball to travel toward the target.
Opening the club face increases the loft, but it also starts to point more to the right of the target (right-handers). A more neutral shaft orientation helps minimize this to some degree, but the body must aim to the left of the target (right-handers) for the ball to go to the target.
Most people tend to overdo the opening of the body. Take a look at the images below of Trajectories 1, 2, and 3. The changes to the alignment are present yet subtle!
Correct shaft orientation helps with reducing the club face pointing too far to the right of the target.
Correct shaft orientation helps with reducing the club face pointing too far to the right of the target.
-

Trajectory 1
Stance very slightly open
-

Trajectory 2
Stance very slightly more open than Trajectory 1
-

Trajectory 3
Stance very slightly more open than Trajectory 2
All Chipping Essentials Sections
-
![]()
Trajectory 1-2-3
Let’s level up and add some tools to your toolbox!
-
![]()
Chipping LLC
Learn the process. Apply the process. Happy days!
-
![]()
The "Putt-Chip"
My not-so-secret, secret weapon! You are welcome!
-
![]()
The "Hybrid Putt-Chip"
My not-so-secret, secret weapon! You are welcome!
-
![]()
The Truth About Lies
Make the right adjustments at the right time.
-
![]()
Set Up Essentials
Set up issues create swing issues and that applies to chipping as well. Let’s get started on the right foot.
-
![]()
Lead Hand Placement
A subtle but important grip adjustment from your regular “full swing” grip.
-
![]()
Common Set Up Errors
Some of the most common set up issues that will ruin your chipping before you even swing the club!
-
![]()
Swing The "Y"
With the set up essentials nailed, it’s time to swing the club!
-
![]()
Common Swings Errors
Some of the common errors you’ll want to avoid!
-
![]()
The "Chip-Stick" Drill
Quit “flipping burgers” and start chipping with this simple drill!


